AniFuzion AniFuzion
  • Why AniFuzion
    • Popular Usages
      • Business Introduction Videos
      • Explainer Videos
      • Marketing Videos
      • Storytelling Videos
      • YouTube Videos
      • Cartoon Video
      • Commercial Video
      • Digital Marketing Videos
      • Corporate Video
      • Promo Videos
      • Consulting Companies
    • Solutions by Business
      • Educational Institutions
      • Enterprise
      • Entrepreneurs
      • Governments
      • Marketing Agencies
      • Small Businesses
      • Restaurant Owners
      • Arts and Crafts Sellers
      • App Developers
      • Filmmakers & Video Producers
    • Solutions by Business
      • Coaches and Consultants
      • Personal Brands
      • SaaS Companies
      • Social Media Marketers
      • Consumer Brands
      • Event Organizers
      • Digital Marketing Teams
      • Content Creators
      • Travel and Hospitality
      • Real Estate Agencies
      • Nonprofits
  • Features
  • Character Families
  • Templates
  • Video Gallery
  • Tutorials
  • Blog

Scene and Environment

  • Introducing Clay Background Style
  • Filter Elements on Timeline
  • Zoom and Pan
  • Add Scene Transition to Animation
  • Preview Video with the All Scenes View
  • Set Background Music For Your Video
  • Extend the Duration of a Scene
  • Edit Scene Background
  • Create and Manage Your Scene

Character

  • Pirate Kit: Unleash High-Seas Adventures in Your Animations
  • Changing the clothes for your 3D character
  • Character Swap
  • DreamSquad: A Versatile Character Family for All Your Animation Needs
  • Adjust the Brightness of Characters to Match the Scene
  • Add Character to Your Video

Action Basic

  • Keep and Reuse Actions with the Action Library
  • Split an Action into Two Parts
  • Repeat an Action or a Pose
  • Rotate a Character
  • Seamless Action Transition with Blending
  • Merge Two Actions
  • Adjust the Speed of Character Action
  • Trim An Action On The Timeline

Action Customization

  • Adjust Feet to Match Background Perspective
  • Adjust Head Orientation for Natural Interaction
  • Flip Action for Seamless Prop Continuity
  • Make Your Action Repeatable
  • Pose Correction with Pose Offset
  • Pose Correction by Setting Arm Spacing

Props and Assets

  • Make the Hand Hold an Object
  • Move a Graphic by Setting Motion Path
  • Add Animated Assets to Diagram
  • Set Enter / Exit Animation Effect on a 3D Prop
  • Rotate a 3D Prop
  • Set Enter / Exit Animation Effect to Graphic and Text

Callouts, Speech and TTS

  • Add Narration to Your Animation
  • Make A Character Talks

Layer

  • Move an Object Above/Below Another Object

Publishing

  • Export the Animation as Animated Flipbooks
  • Share Your Work as Bundle File
  • Export Video as MP4

Case Study

  • Creating a Presentation Video with Motion Mixer
  • Creating a Dance Competition Scene with Motion Mixer

Tips & Techniques

  • How to Create a Clear Story Flow with Image Transitions and Action Changes
  • Present Bullet Points Creatively Through Engaging Animations
  • How to Make Your Character Appear and Disappear Mysteriously in the Scene
  • Seamlessly Integrate Your Character into the Scene
  • Create a Smooth Video with Harmonious Colors and Natural Movements
View Categories
  • Home
  • Tutorials
  • Callouts, Speech and TTS
  • Make A Character Talks

Make A Character Talks

When creating an animation, characters often play a crucial role in conveying the story or message. To bring these characters to life, adding speech is essential. Visual Paradigm Online makes it simple to integrate speech into your characters with just a few easy steps. In this tutorial, we’ll show you how to add speech to your characters using VP Online’s powerful tools.

Text-to-Speech Feature #

Illustration designed for text-to-speech feature.

The text-to-speech (TTS) feature in VP Online is a powerful tool that allows you to convert written text into spoken dialogue, seamlessly integrated into your animations. This feature utilizes advanced algorithms to generate natural-sounding speech, offering a range of voices that can be tailored to match your character’s gender, age, and language. By simply entering your script, you can generate realistic speech that fits the tone and mood of your scene.

The benefits of using TTS in your animations are significant. It saves time and resources by eliminating the need for manual voice recording. Additionally, the flexibility of TTS allows for easy adjustments to the script, enabling quick updates or changes without needing to re-record. This feature also supports multiple languages, broadening the reach of your content to a global audience. Overall, TTS enhances the efficiency and accessibility of your animation projects, allowing for a more streamlined and professional workflow.

Automatic Lip Sync Capabilities #

Automatic lip sync capabilities for 3D characters.

One of VP Online’s standout features is its automatic lip sync capability. Once you’ve added speech to a character, the software automatically synchronizes the character’s mouth movements with the dialogue. This feature creates the illusion that the character is actually speaking, making your animation more engaging and realistic. The precise synchronization of lip movements to the speech not only saves time but also enhances the overall quality of your animation.

Adding Speech to Characters #

To add speech to a character, begin by pressing the Add button on the speech bar located under the character in the timeline and enter your script in the text box that appears.

Add speech to the characters instead of adding as narration.

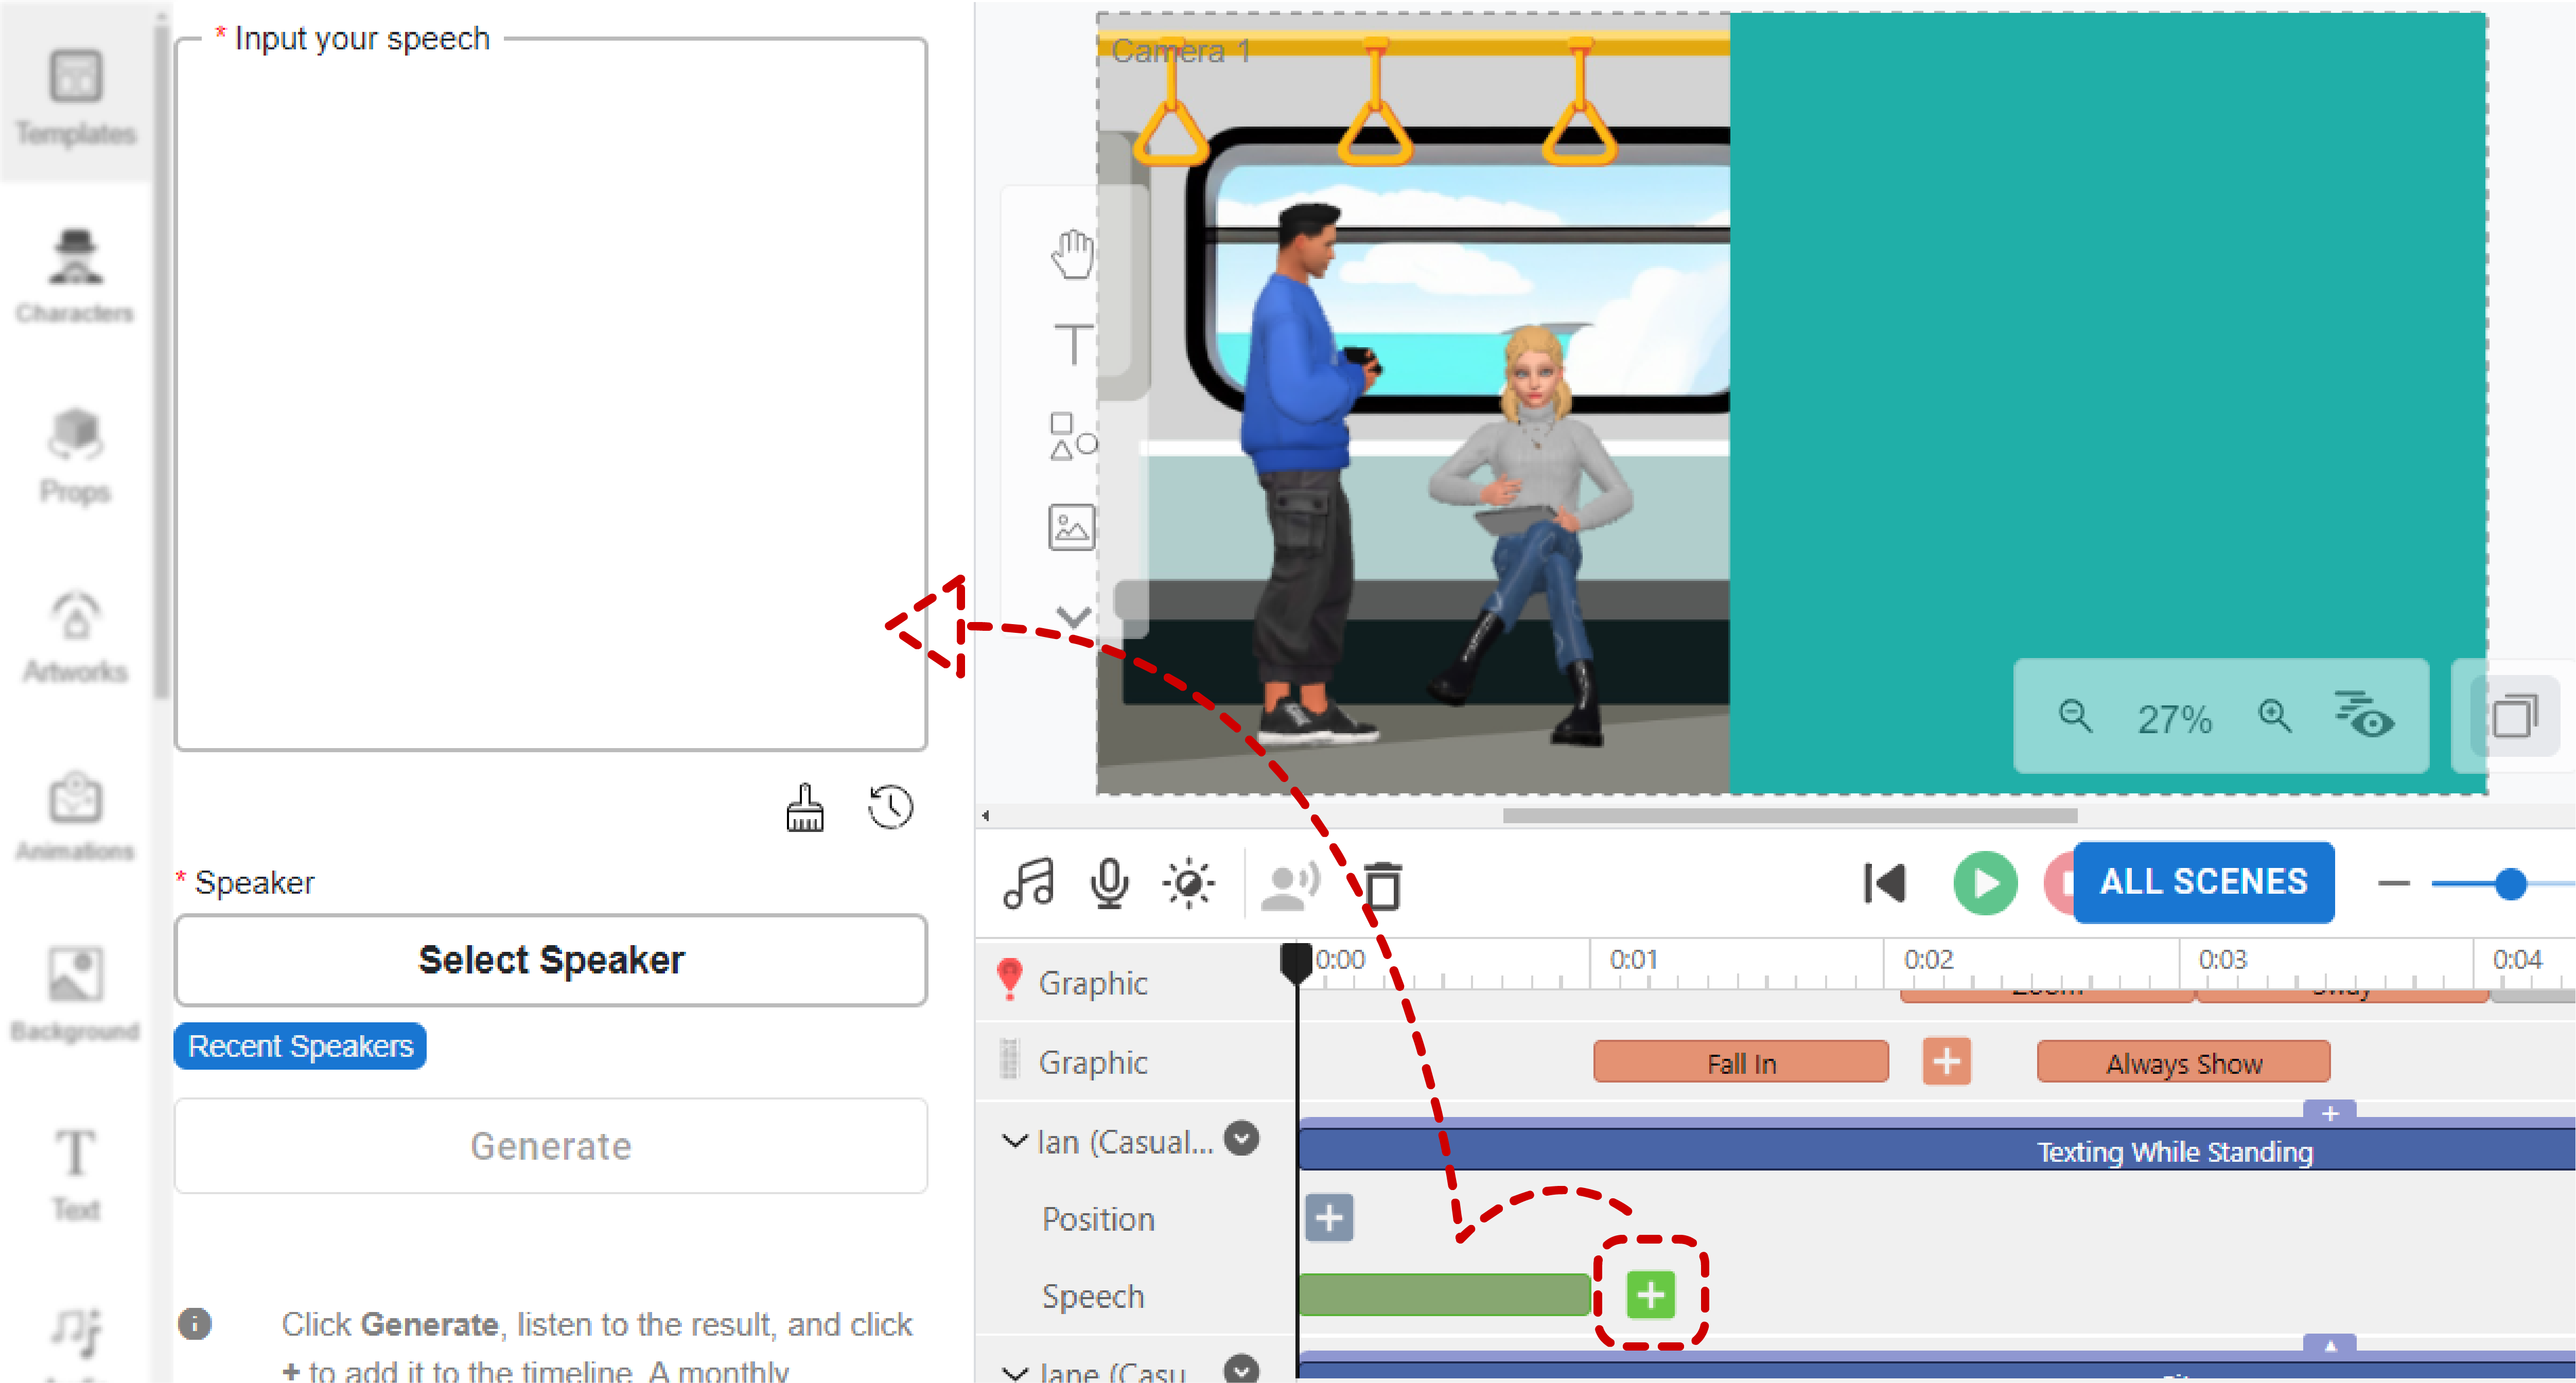
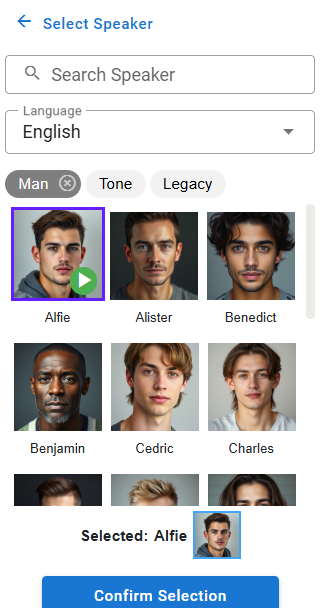
Next, select a speaker by choosing the gender and language that best fit your needs. You can preview the voice by clicking the play button, and once satisfied, click Confirm Selection and Generate to start generating the speech.

Various speakers are provided for the text-to-speech feature.

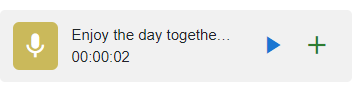
After the speech is generated, you can preview it by clicking the play button and add it to the timeline by pressing the Add button.

Preview and add the speech to the timeline

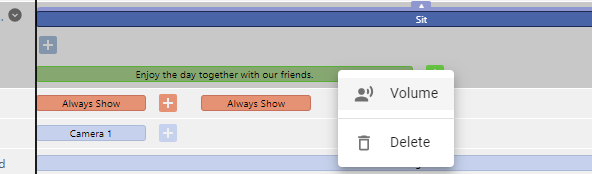
We can adjust the volume of the speech in the right-click menu.

Adjust the volume of the speech on the timeline

Enhancing Animation with Character Speech #

Integrating character speech into your animation adds depth and engagement, bringing your characters to life in a way that visuals alone can’t achieve. Spoken dialogue introduces personality, making interactions more dynamic and the storyline more immersive. It allows you to convey emotions, thoughts, and nuances that enhance the overall impact of your animation.

In addition to enriching the narrative, character speech improves the pacing of your animation, ensuring that conversations flow naturally and at the right speed. Whether you’re telling a story or explaining a concept, character speech helps maintain viewer interest and adds a professional touch, making your animation more relatable and compelling.

Adding Narration to Your Animation #

In addition to character speech, you may also need to add narration to your animation. This is done using the Add Speech (Text-to-Speech) button. The process is similar to adding speech to a character, but the narration bar will appear at the bottom of the timeline. Narration can provide context, explain complex ideas, or guide the viewer through the animation, further enhancing the storytelling aspect of your work.

Explore More: Add Narration to Your Animation

Add speech separately as narration in the animation.

Share This Article :
  • Facebook
  • X
  • LinkedIn
  • Pinterest
Add Narration to Your Animation
Table of Contents
  • Text-to-Speech Feature
  • Automatic Lip Sync Capabilities
  • Adding Speech to Characters
  • Enhancing Animation with Character Speech
  • Adding Narration to Your Animation

Copyright © 2025 Anifuzion.com

Company

About Us

Help?

FAQ

Privacy

Term & conditions

Reporting

Follow Us

Youtube Facebook X-twitter Instagram Linkedin