Visual Paradigm Online provides a powerful and intuitive platform for creating engaging animation videos, making it an excellent choice for presentation videos. One of the standout features is the Motion Mixer, which allows you to seamlessly blend multiple actions to create natural and expressive movements. Instead of relying solely on premade actions, you can mix and modify them to craft custom actions that perfectly fit your narrative. This is particularly useful for presentation videos, where smooth and professional-looking character motions are essential for keeping the audience engaged.
In this tutorial, we will create a presentation video titled “Raising Working Efficiency,” featuring a speaker delivering a talk. We will explore key features such as applying and customizing actions, adjusting character movements, and refining the animation with the Motion Mixer. Let us get started!
Bundle file is provided for you to take reference. If you want to start from specific section, please work with the scene after the section title. Click here to learn how to import the bundle file to your workspace.
Step 1: Setup Your Scene #
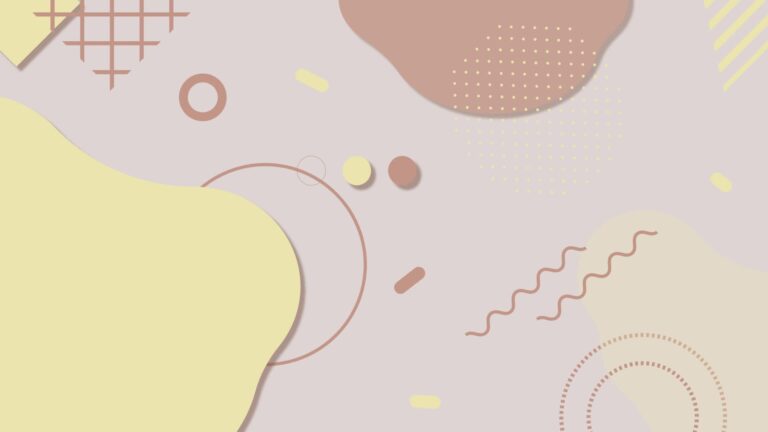
To begin, we need to prepare the background and character for the presentation video. Since the focus of this animation is on information delivery, there is no need to build a detailed environment. Instead, we can use a graphic-style background, which keeps the visuals clean and professional while ensuring the audience stays focused on the speaker and content.
Using an abstract background offers several advantages:
- Minimal Distractions – Keeps the viewer’s attention on the speaker and message.
- Professional Aesthetic – Provides a polished and modern look.
- Consistent Branding – Can match a company’s or presenter’s style with appropriate colors and themes.
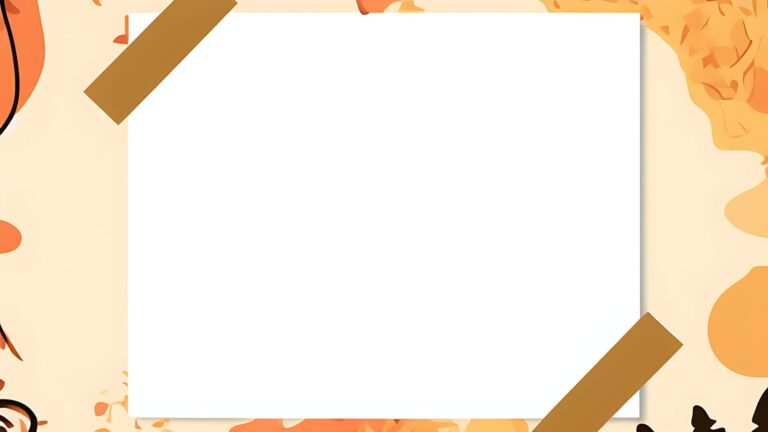


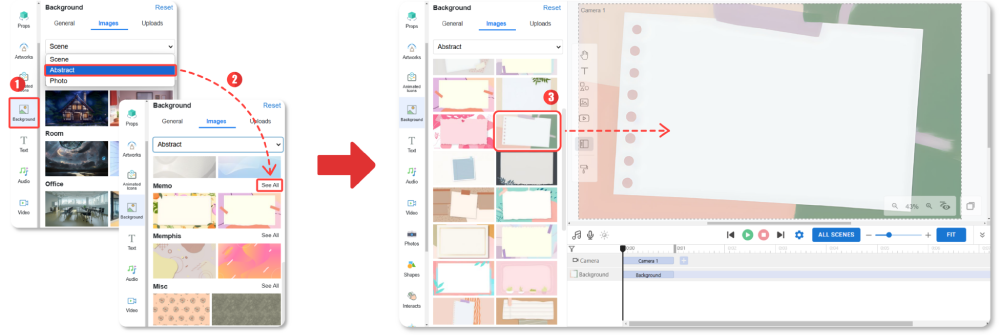
Apply the Background #
- Open the Background menu on the left.
- Navigate to the Abstract category and select Memo.
- Click the background image to apply it to the editor.
Add the Speaker #
Now, let us add a speaker character to deliver the presentation. VP Online offers various character styles, allowing you to select one that best fits your presentation’s tone.
💡 Tip: Some character families have customizable clothing. You can also upload your own texture to personalize the outfit. Learn more here.
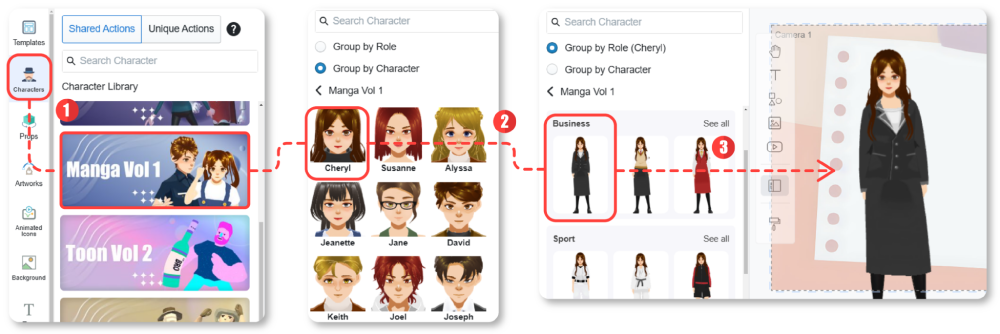
- Open the Character menu and select Manga Vol. 1.
- Under Grouped by Character, choose Cheryl > Business.
- Drag and drop the character onto the editor.
- Resize and reposition the character as needed.
Step 2: Make Your Character Talk #
To enhance the presentation experience, we can make the speaker talk naturally using the Text-to-Speech (TTS) features. These tools allow the character to speak automatically with synchronized mouth movements, creating a more engaging and professional presentation.
Here are the reasons using text-to-speech in our video:
- Variety of Voices – Choose from multiple voice options to match the tone of your video.
- Smooth Lip-Sync – The character’s mouth moves in sync with the generated speech.
- Efficient Editing – Quickly adjust the speech without manual animation.
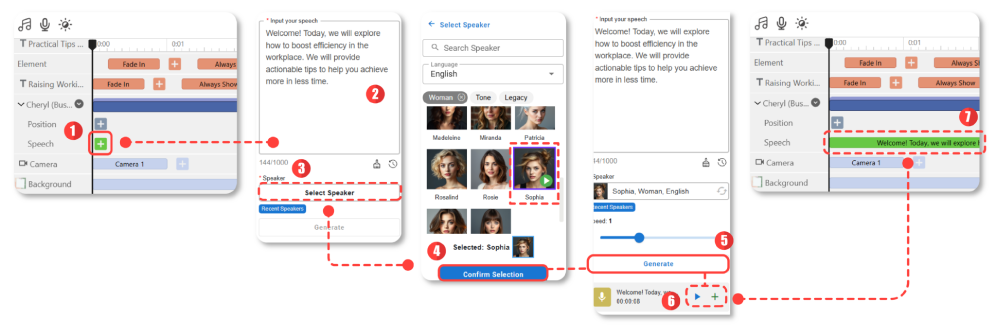
Add Speech to the Character #
- Click the Add button on the speech bar.
- Enter the script in the speech panel on the left.
- Select a voice that fits the presentation style.
- Preview the voice using the Play button and click Confirm Selection if satisfied.
- Click Generate to create the audio.
- Preview the generated speech using the Play button, then add it to the timeline with the Add button.
- Adjust the speech bar position to control the starting time of the dialogue.
Step 3: Add Animation Effects to Elements #
To make the presentation video more engaging, we can add animation effects to elements like text and graphics. Entrance and exit animations help introduce elements smoothly, ensuring a polished and professional look.
Animation effects help enhance the visual appeal of the presentation by making key content stand out. They also ensure smooth transitions, allowing elements to appear and disappear naturally without abrupt changes. Additionally, these effects are customizable, enabling users to adjust the setting like direction to match the flow of the video.
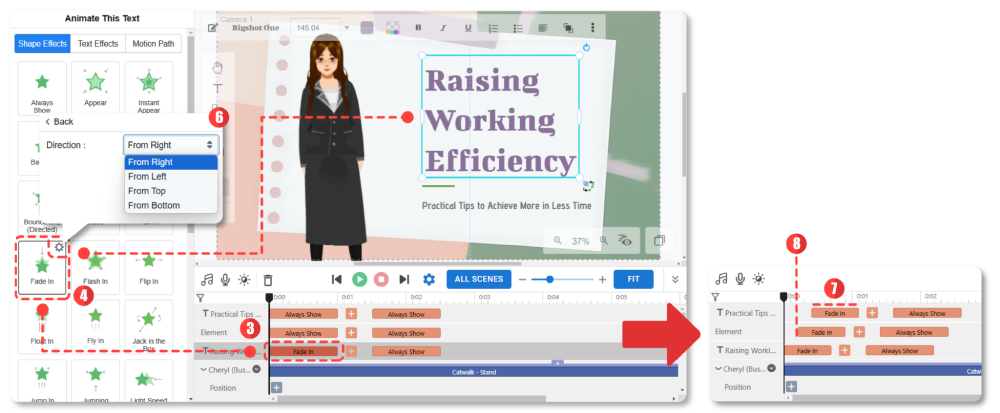
- Add text content and customize the font, size, and color.
- Select the text block.
- Click the Animation Effect bar on the timeline (default: Always Shown).
- Hover over animation thumbnails to preview different effects.
- Click on an effect to apply it to the element.
- Use the wheel button at the top right to customize the effect, such as changing its direction.
- Adjust the length of the bar to control the speed
- Move the position of the bar to control the starting time
Step 4: Customize Actions with Motion Mixer #
Motion Mixer is a powerful tool that allows users to combine different actions seamlessly. VP Online provides 2,000+ actions, and while many may already fit the video’s theme, users may still want to customize movements for smoother transitions.
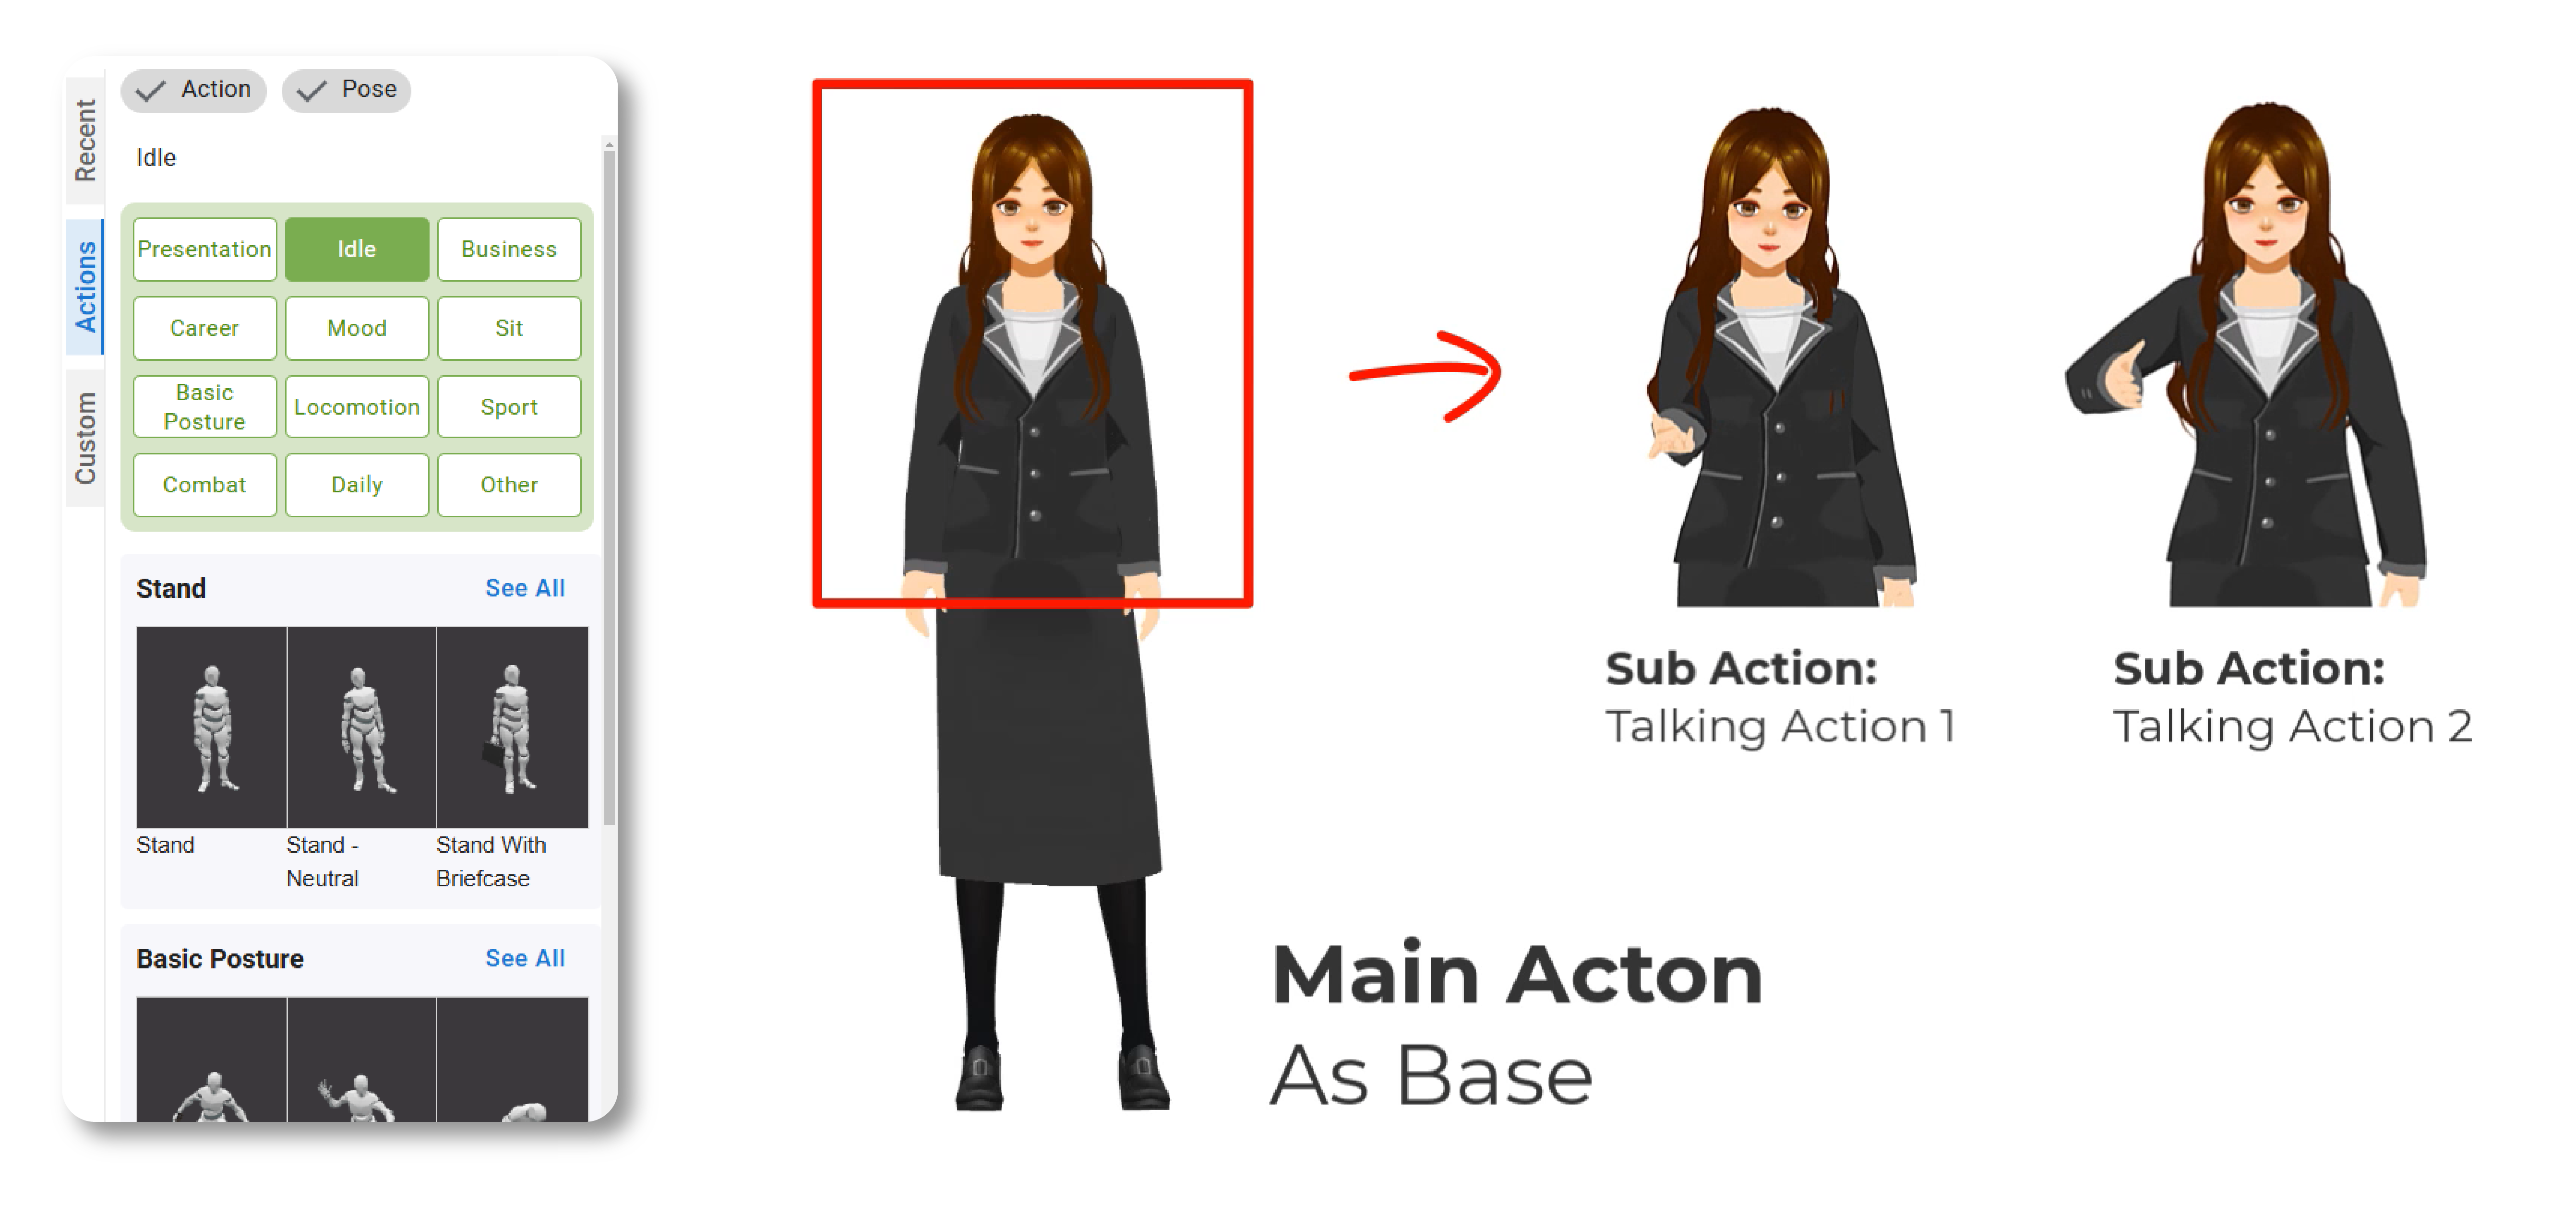
For example, in this case, the speaker needs a talking action. Since different actions may have slightly different standing poses, simply linking them with transition effects may disrupt continuity. Motion Mixer helps solve this by letting users choose a base action—such as a standing pose—and then overwrite only the upper body with the desired talking action. This ensures the lower body remains consistent, preventing noticeable jumps between poses.
💡 Tip: The Idle category is a great choice for a base action when mixing upper-body movements. These animations have minimal movement, making them ideal as a foundation.
- Select the character.
- Apply an action from the Idle > Stand > Catwalk – Stand.
- Extend the action duration by dragging the edge of the action bar, aligning it with the length of the speech.
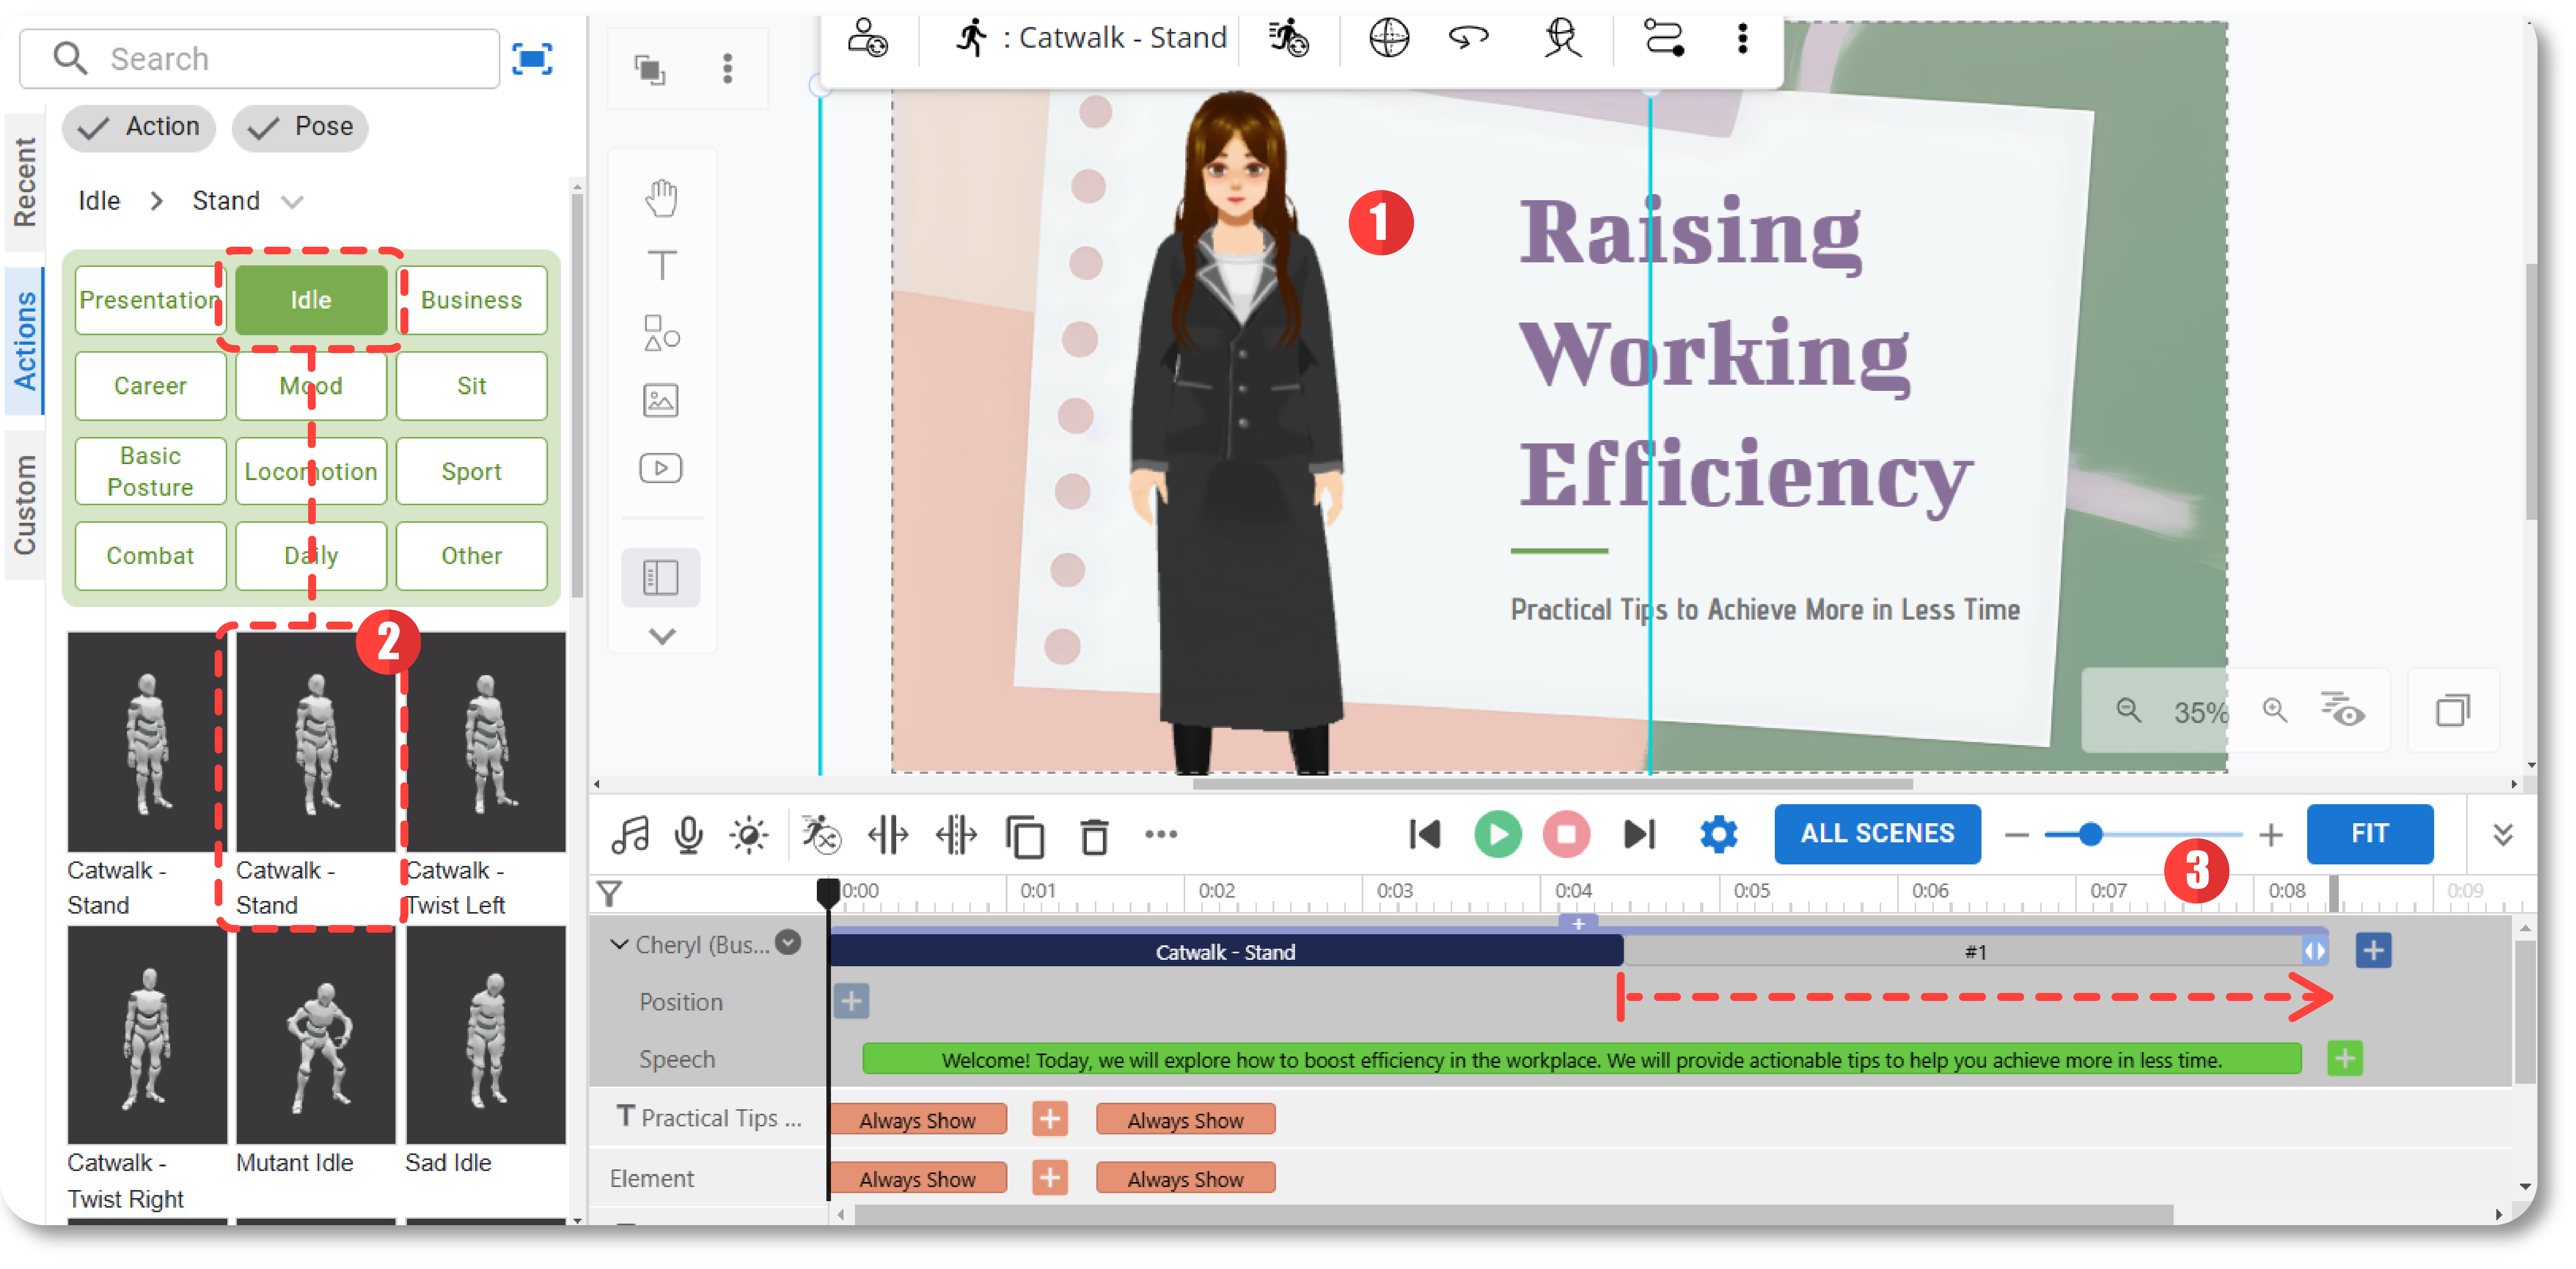
- Click Show Motion Mixer at the top of the action bar. The repeated action will automatically merge into a single action bar.
- Select the first talking action and click Set to Timeline.
- There is remaining empty space in the timeline. Click the Add button.
- Select another talking action and click Set to Timeline again.
- Preview the mixed action using the Play button.
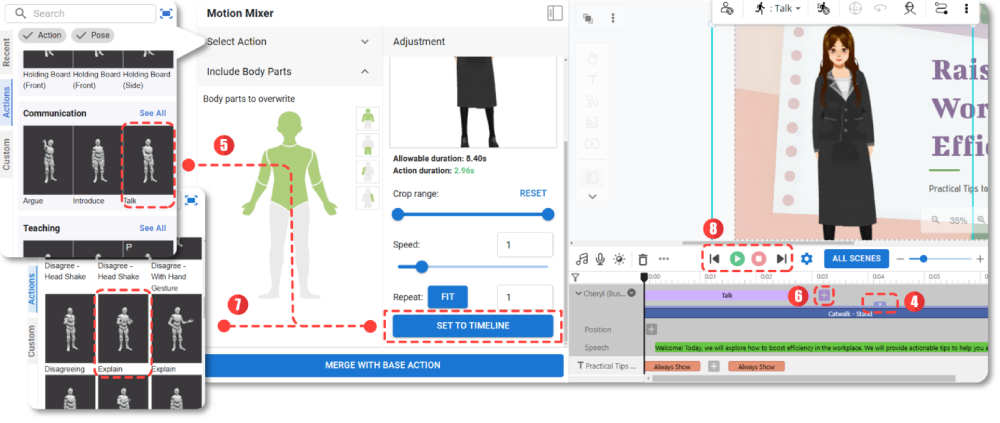
Step 5: Customize Actions with Motion Mixer (Partly) #
VP Online provides four default selections for quick adjustments, while users can also manually pick specific parts for precise customization. This feature enhances flexibility, allowing users to combine actions more naturally. It is particularly useful when only a specific body part needs modification while keeping the rest of the movement unchanged.

Some actions involve linked body movements, meaning that when one part moves, others naturally follow. If an entire section is replaced, the original movement may be lost, making the animation feel unnatural. With precise body part selection, users can keep essential movements intact while refining specific actions.
Case that only mix with specific parts #
In this video, our speaker is talking while walking out. The base action provides a natural full-body movement, ensuring realistic motion. However, if we directly mix in a talking action, we might lose the subtle body movements from walking, making the animation look less natural.
To preserve the walking motion, we will only overwrite the right arm with the talking action. This way, the character keeps the natural movement while delivering the speech.
- Select the character, open the Motion Mixer pane
- Pick introduce as sub-action
- Under Body Parts to Overwrite, select Right Arm
- Customize the range and speed (optional)
- Click Set to Timeline
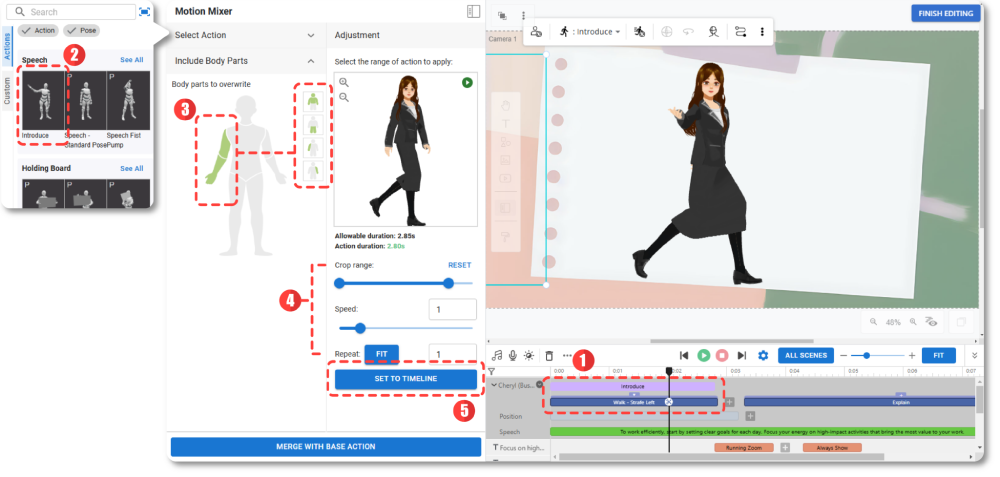
Step 6: Add Background Music #
Background music enhances the overall impact of an animation by creating the right mood and atmosphere. It helps maintain audience engagement, reinforces the message, and makes transitions feel smoother. A well-chosen track can make a presentation video feel more professional and immersive.
VP Online provides a wide selection of background music in various genres and moods. You can freely browse the library and pick a track that best fits the video’s tone and purpose.
- Click Set Background Music on the timeline.
- Filter by Genre and Mood (optional).
- Preview the music using the play button and apply it to the animation with the add button.
- Adjust the volume and apply fade-in / fade-out effects for a smooth audio transition.
By adding background music, the animation becomes more engaging and polished, creating a stronger connection with the audience.
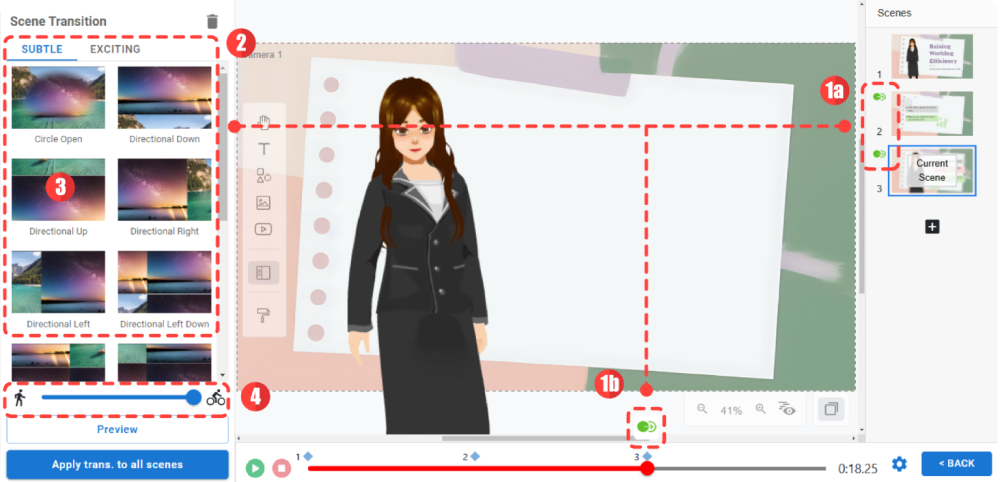
Step 7: Add Scene Transitions #
Scene transitions help create a seamless flow between different parts of the animation, making it easier for viewers to follow along. They help prevent abrupt cuts, making the video more engaging and professional. By adding transitions, we can also enhance the storytelling effect, guiding the audience smoothly from one scene to the next.
VP Online offers a variety of scene transition effects that can be easily applied to enhance the overall viewing experience.
- Choose a method to open the Scene Transition panel:
- (a) Open the Scenes Panel and click the Scene Transition button.
- (b) OR go to All Scene View and press the Edit Transition button.
- Hover over the transition thumbnails to preview the effect.
- Click a transition effect to apply it to the scenes.
- Adjust the speed of the transition effect if needed for a smoother flow.
With well-placed scene transitions, the animation will feel more cohesive and visually appealing, ensuring a better viewing experience for the audience.
Start Creating Your Own Animation with VP Online #
Now that you have learned how to create a presentation video with Motion Mixer, it is time to put your skills into action! Use the features mentioned in this tutorial to create your own animated presentation and explore the endless possibilities of animation.
With VP Online, you have access to a powerful set of tools, including customizable characters, motion mixing, text-to-speech, animation effects, and more—all designed to help you bring your ideas to life with ease. Try it now and start creating your own animations with VP Online!


